Certain steps are required to incorporate the Jalpi Web Widget into your WordPress site. Follow these guidelines to proceed:
Step 1: Go to your WordPress administrator site.
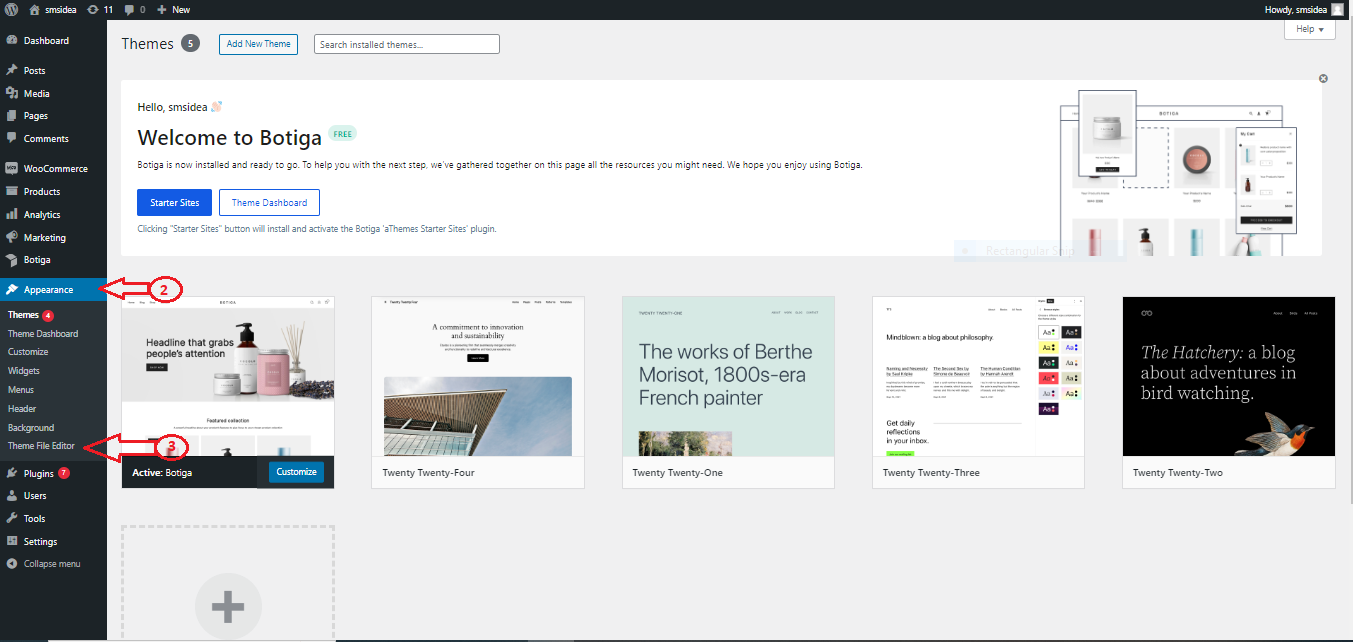
Step 2: Access the "Appearance" section.
Step 3: Select the "Theme File Editor" option from the menu on the left-hand side of the screen.

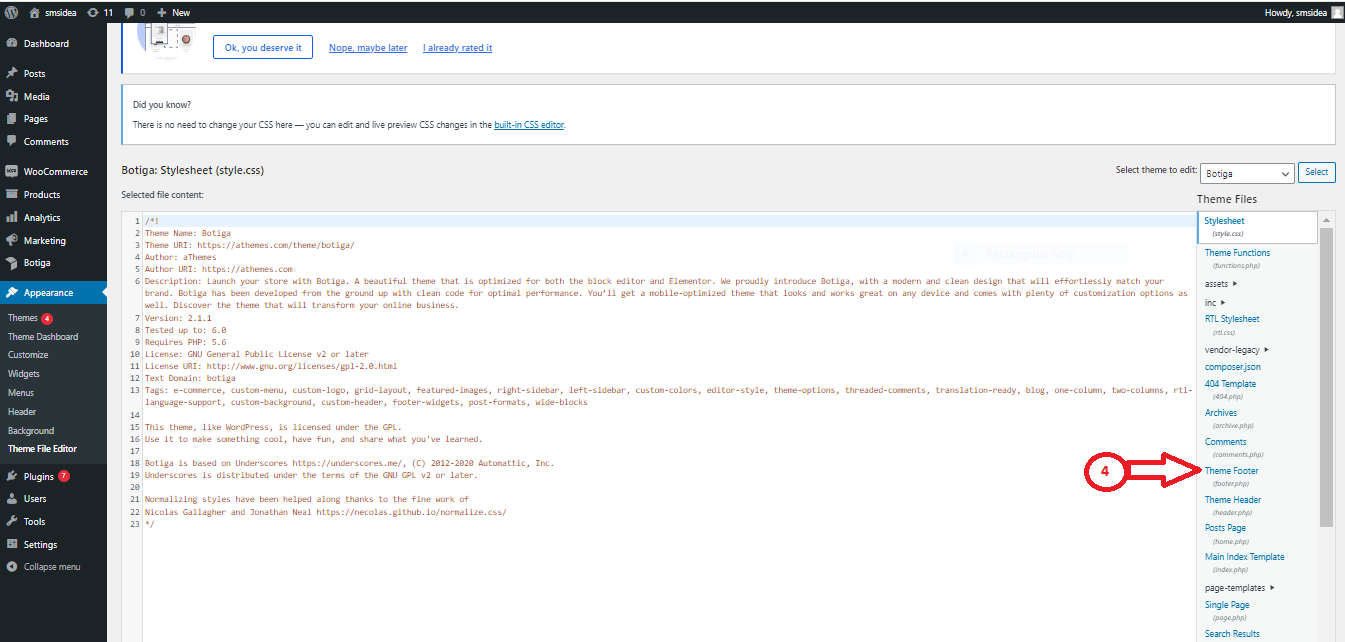
Step 4: On the right-hand side, locate and click on the "Theme Footer" option.

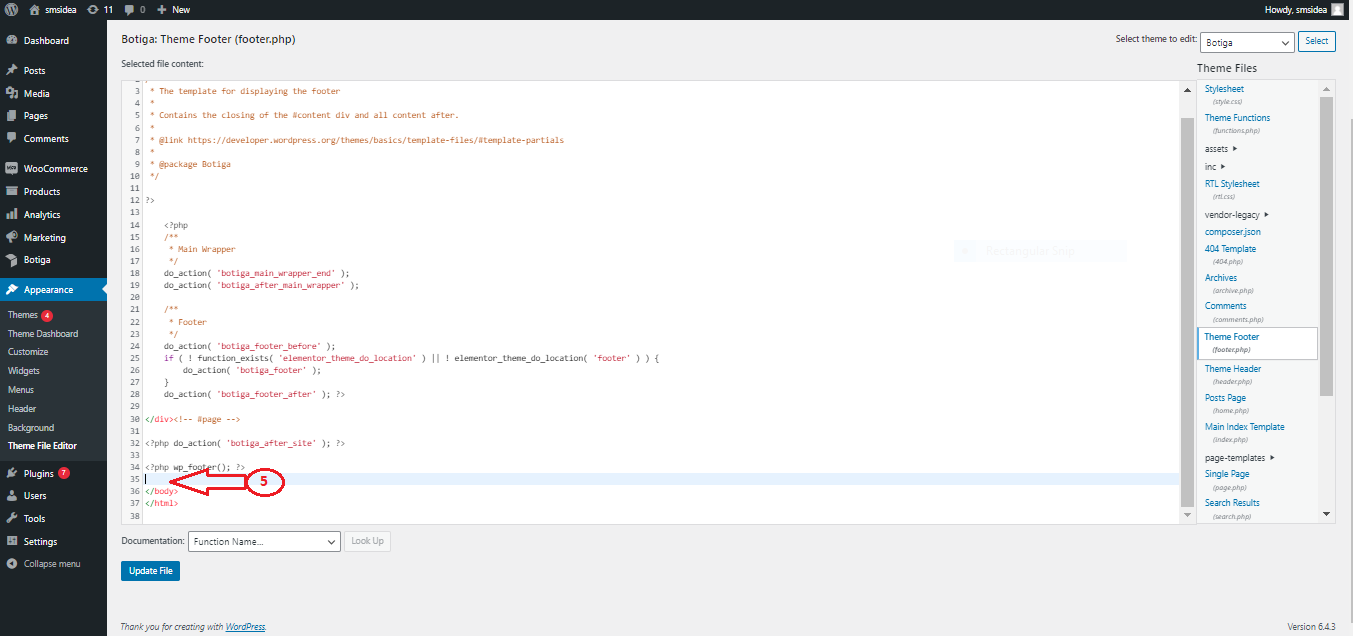
Step 5: Within the code on the right side, place your JavaScript code directly preceding the "</body>" section. Retrieve the Web Widget JavaScript code from the Jalpi website by following the steps outlined below:
-
Sign up at jalpi.com if you haven't registered yet.
-
Go to the "Channels" section in the left-side menu.
-
Create a new channel by clicking on "Add Channel" and choose "WebChat."
-
Enter the necessary details and copy the script tag from the Configuration tab. Paste this JavaScript code into the body of your WordPress layout, following the instructions provided in Step 5.

Step 6: Save your modifications to the file and refresh your site to view the updates.
