To implement the Jalpi Web Widget onto your Shopify store, you'll need to follow a set of procedures. Here's a step-by-step guide:
Step 1: Visit your Shopify admin interface.
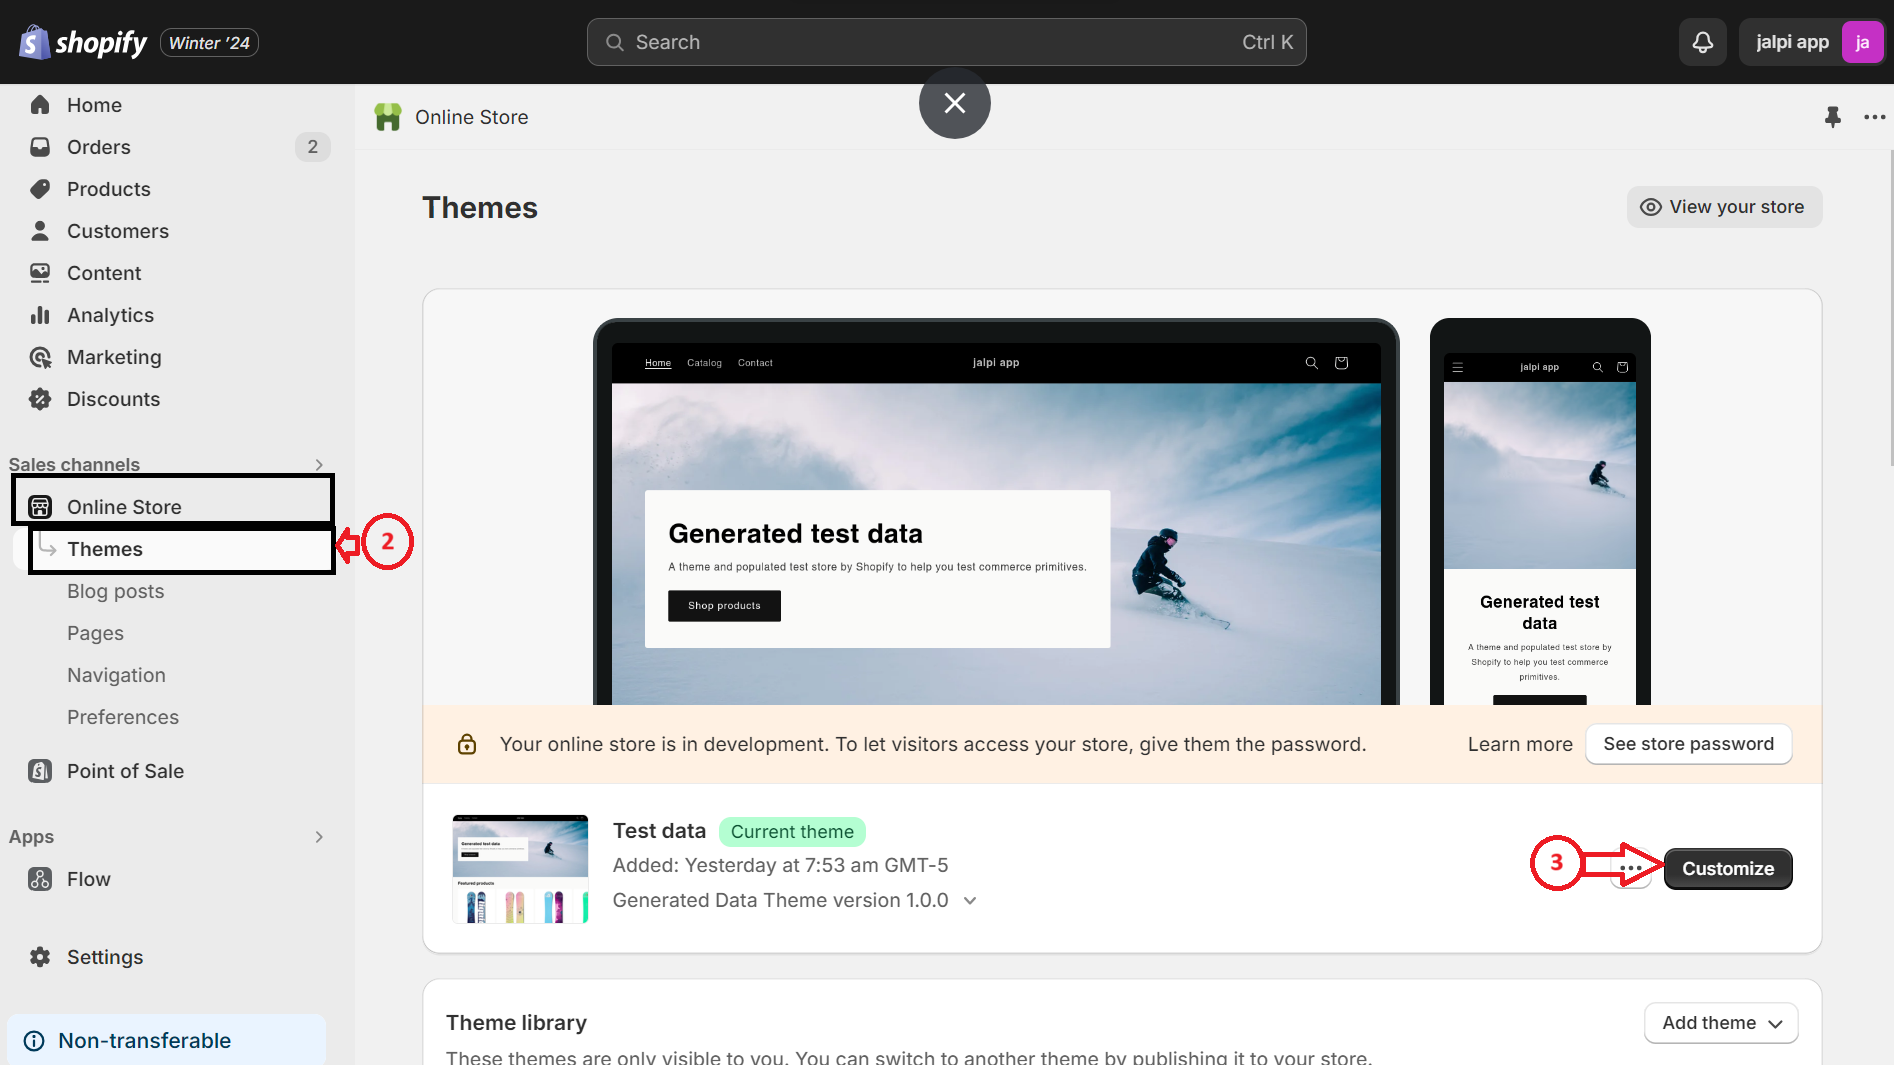
Step 2: Navigate to Online Store > Themes section.
Step 3: Select the "Customize" option found on the right-hand side of the screen
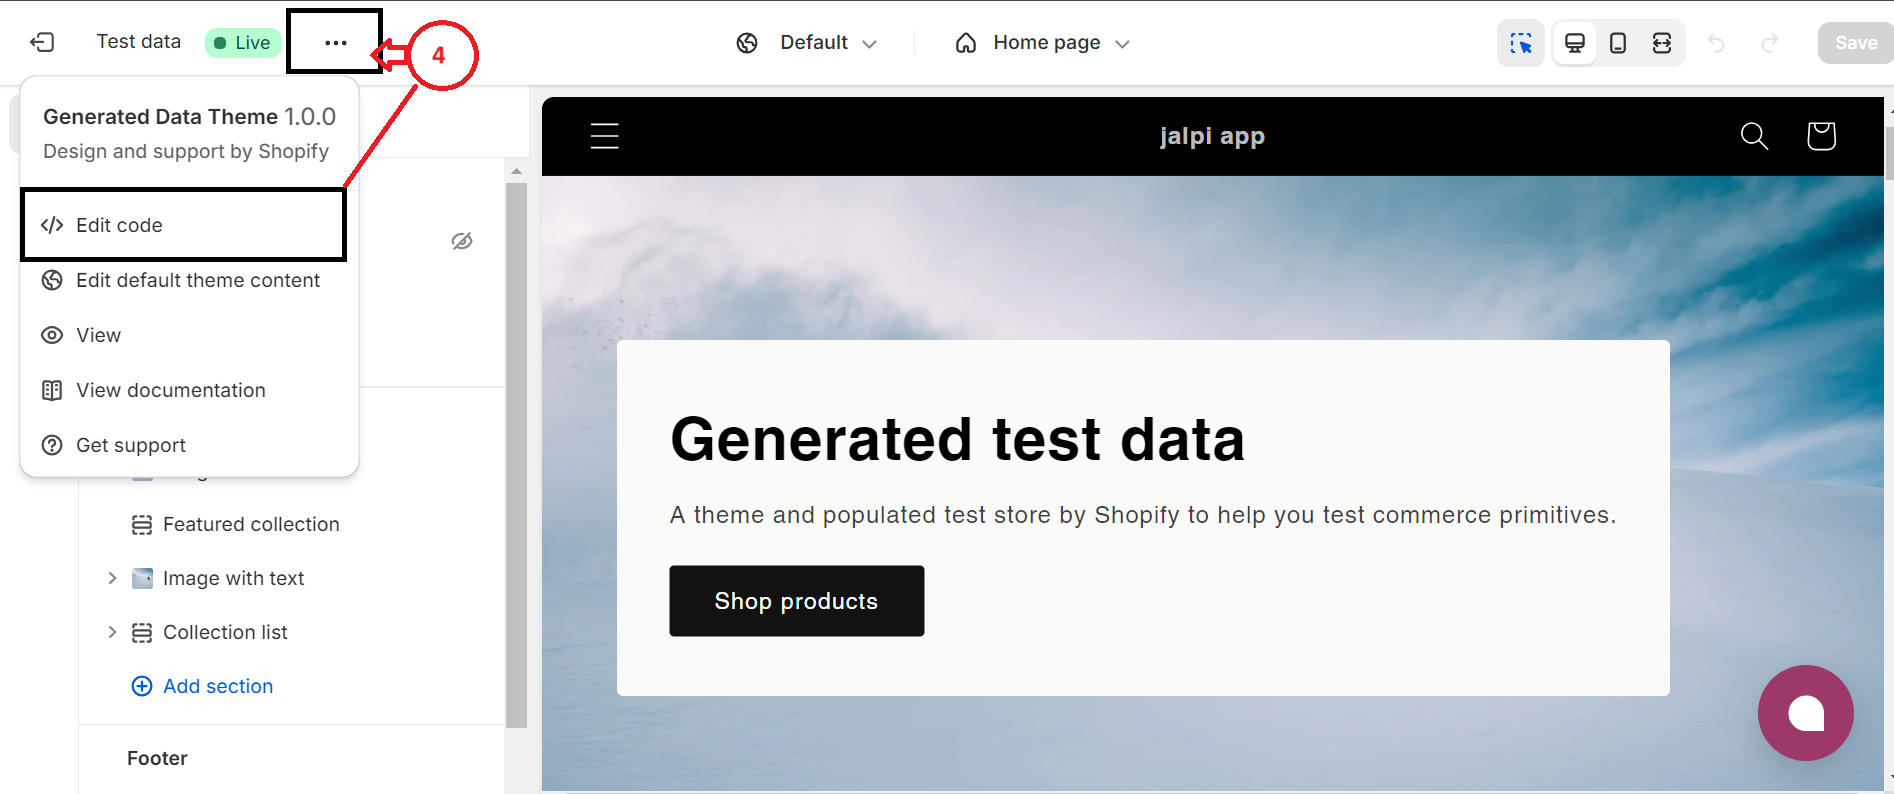
Step 4: In the upper left corner, identify the option marked with '...' and click on it to display a list of choices. Choose 'Edit code.'
Step 5: Find and select 'theme. Liquid' within the 'Layout' folder. This will generate a code file on the right-hand side of the screen.
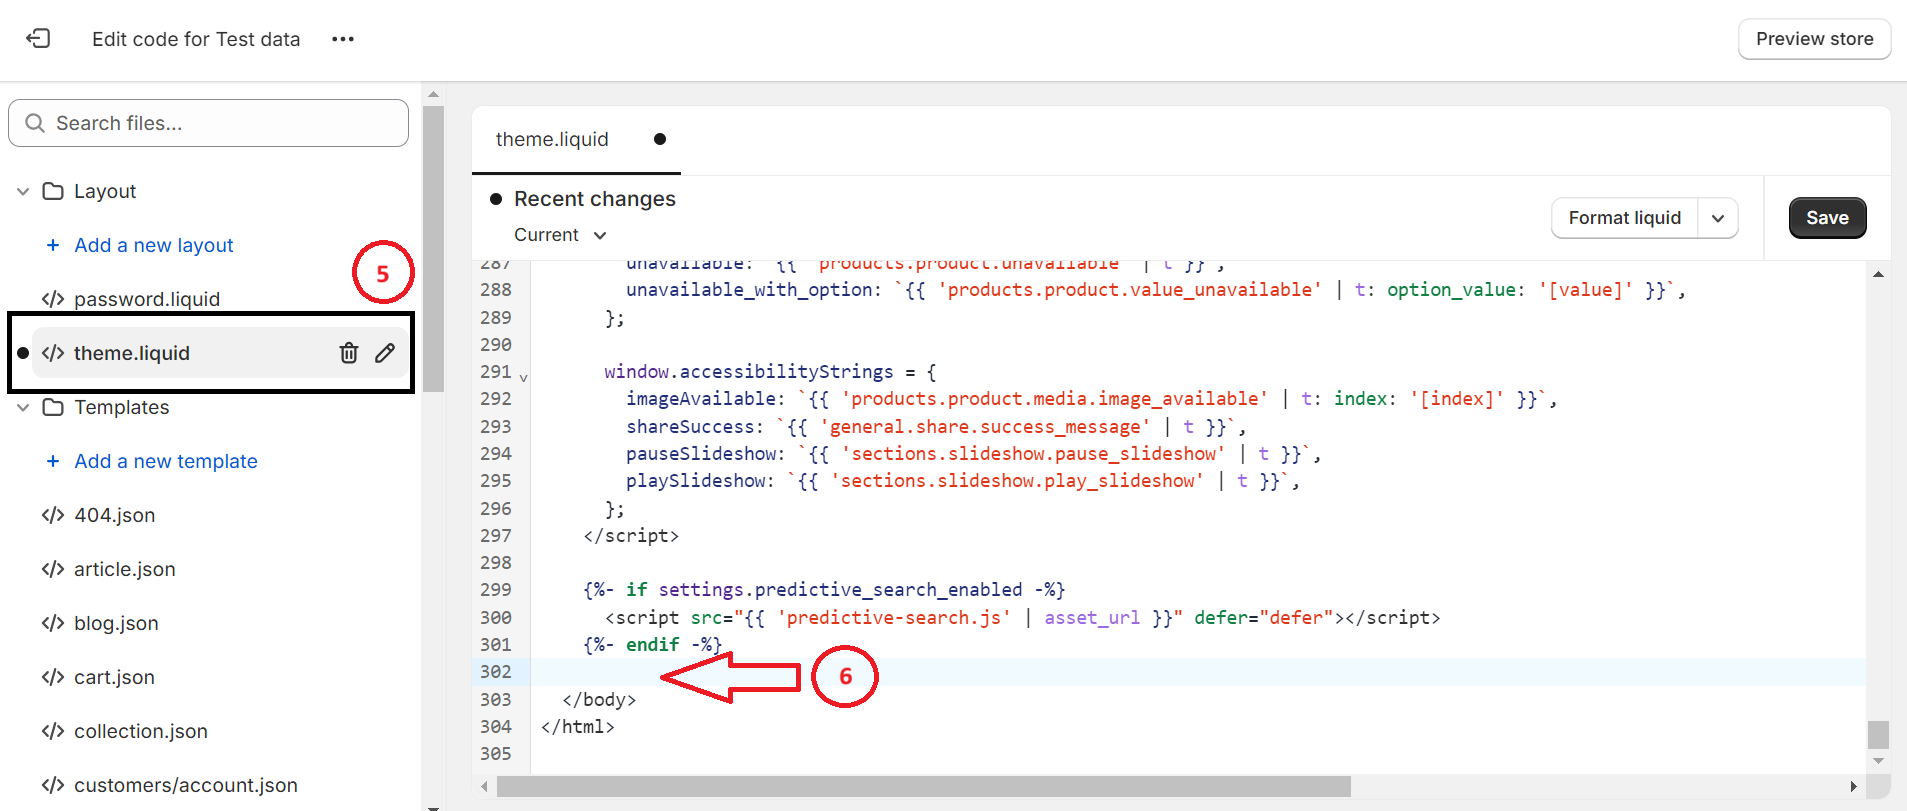
Step 6: Within the code on the right-hand side, place your JavaScript code just before the closing '' tag.
Instructions for obtaining the Web Widget JavaScript code from the Jalpi website:
-
If you haven't signed up already, register on jalpi.com to create an account.
-
Navigate to the 'Channels' option located in the left-side menu.
-
Click on 'Add Channel' and choose 'WebChat' to create a new channel.
-
Complete the necessary details and retrieve the script tag from the Configuration tab.
-
Copy the JavaScript code provided, which should be placed within the body tag of your Shopify layout, as indicated in the previous step.
Step 7: Finalize your edits by saving them, then reload your site to view the updates
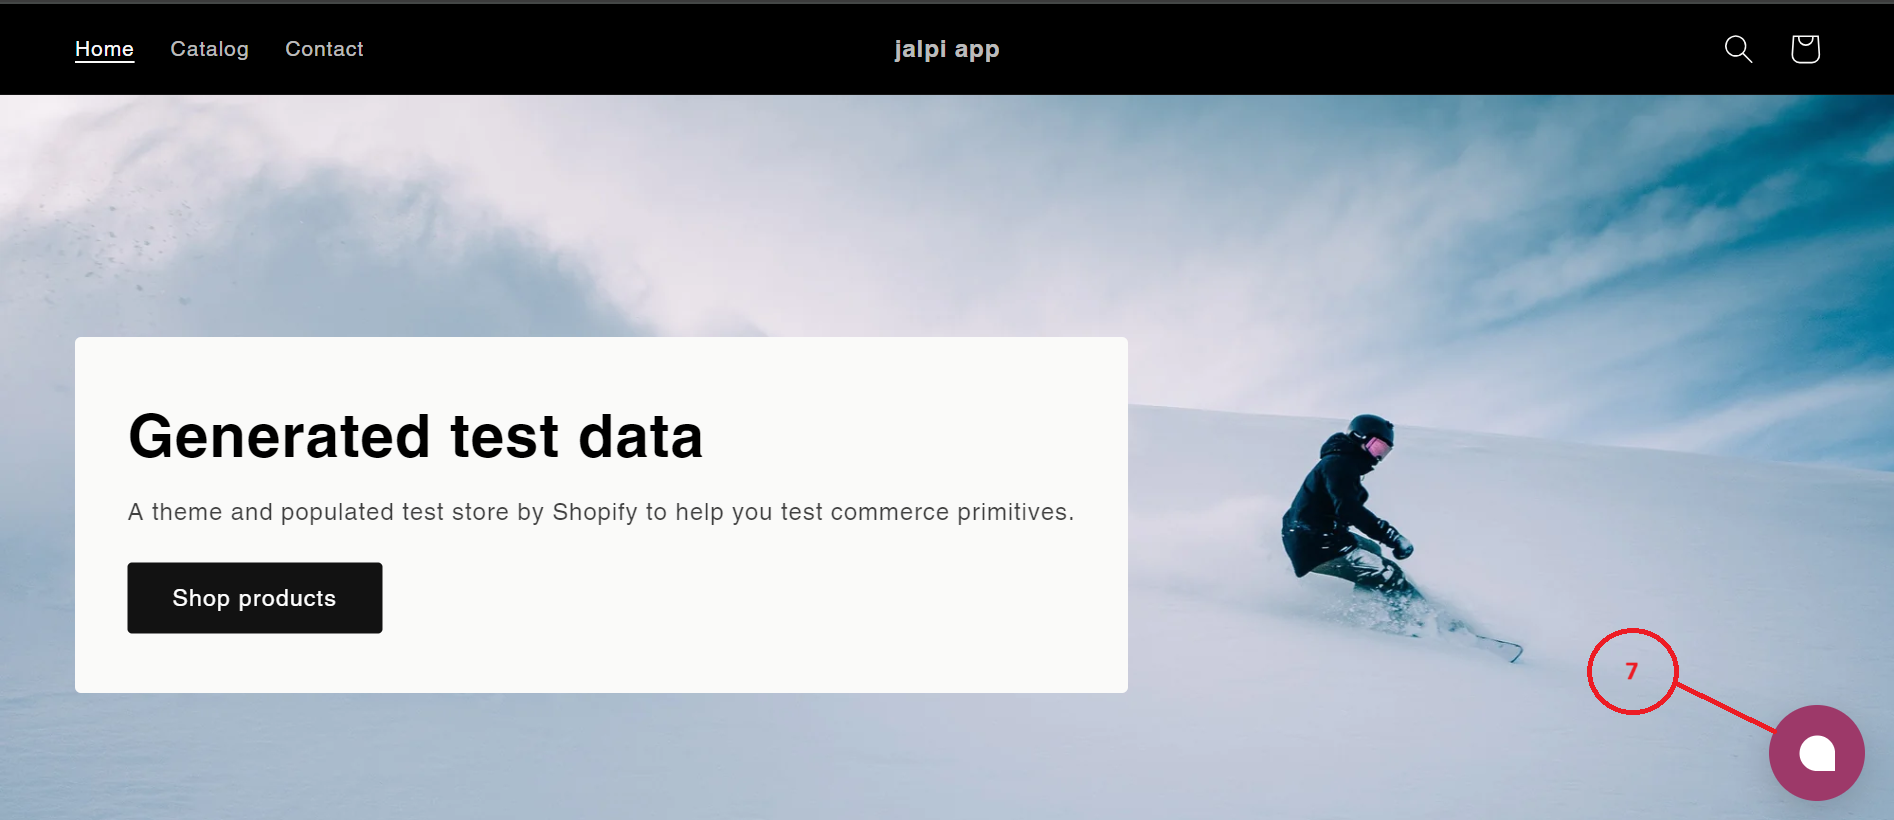
By adhering to these instructions, you'll effectively incorporate the Jalpi Web Widget into your Shopify store, enriching user interaction and facilitating a smooth communication interface.